

Pulk Sleds
Pulk sleds are a practical medium to transport load in a snowy cold weather environment. A pulk sled is a short sled of historically nordic origin. However, numerous cultures developed forms of sleds to aid in oversnow movement. Pulk sleds are simple, relatively lightweight, and can be pulled on foot. It is also possible to use your pulk sled in combination with snowshoes or skis.
DIY Pulk Sled Material
Gather Materials
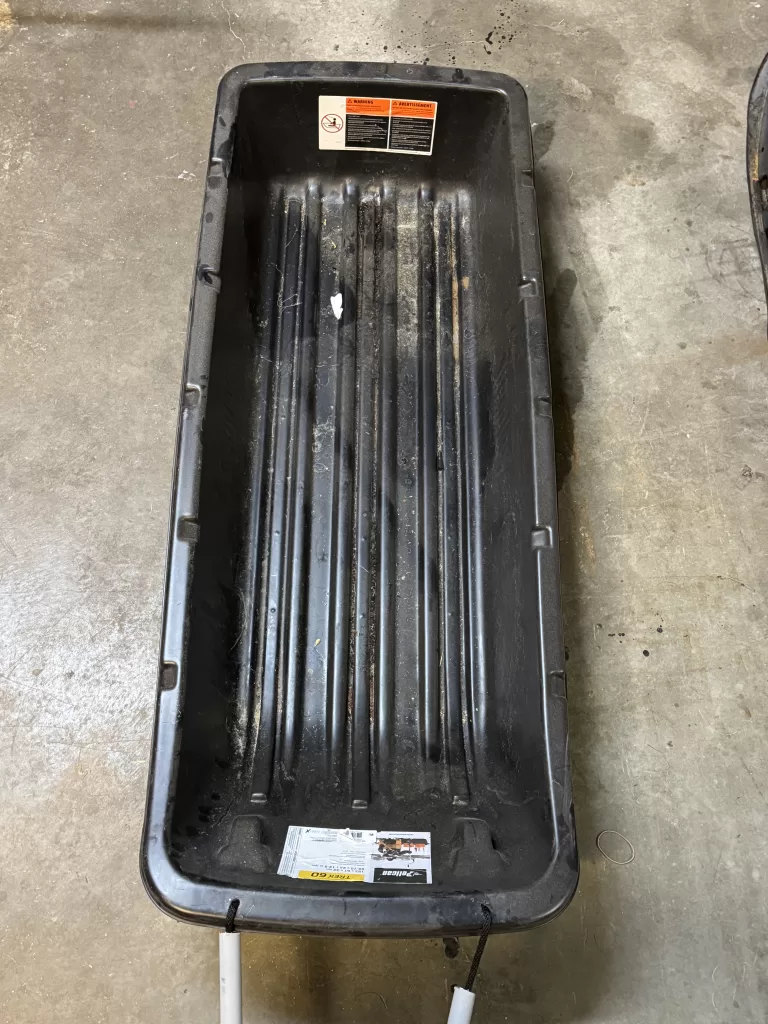
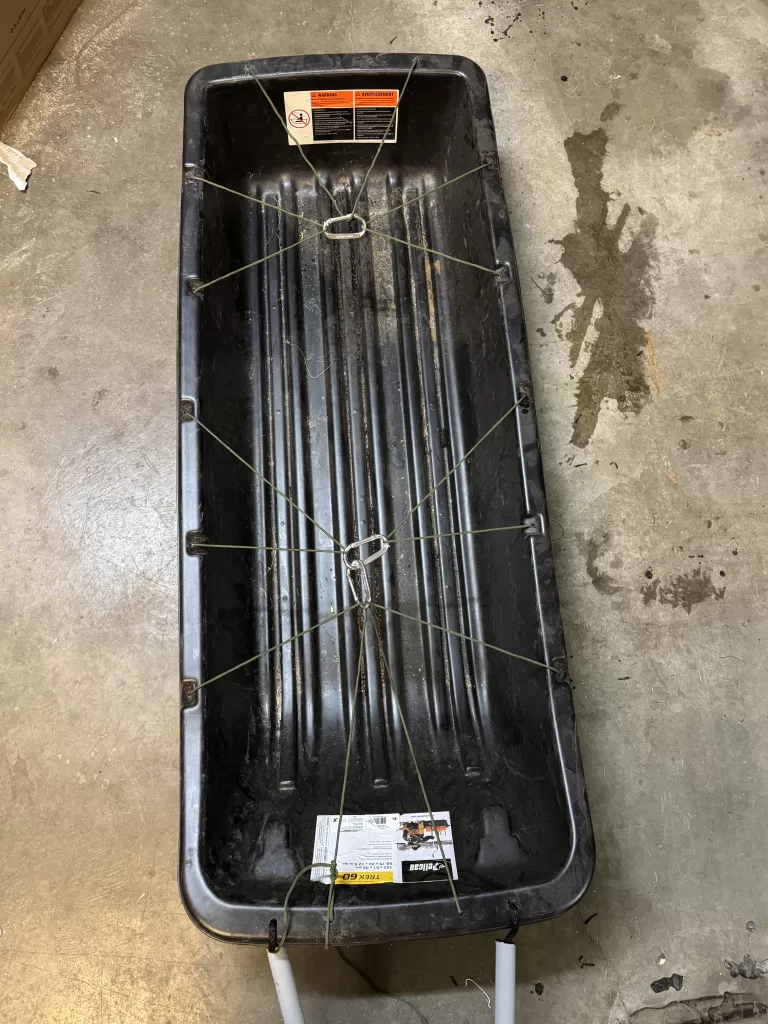
- Pelican Trek 60 Sled (59.75″x24″x12.5″) – Used from Facebook Marketplace $60
- Rope – 20 ft 3/4″ Rope – Recommend a static cordolette line to avoid stretching $15
- Conduit Pipe 2 x 10 ft – $22 ($11/section)
- Large S-Carabeaner Pack of 3 – $14
- 550 Paracord 20 ft – Already owned
- Standard Carabeaners Pack of 3 – $5
- Tarp for Liner – Already Owned

How to Build a DIY Pulk Sled
Step 1 – Measure Poles with Skis or Snowshoes
First, determine whether you will primarily use your sled for skiing or snowhoeing. If you will use your DIY pulk sled for both, stick with the ski length measurements. Wearing your skis or snowshoes, measure how much length you will need to account for your stride. Add about an extra foot of length of clearance. This will become the length of your pulk sled poles.
At 6′ 2″ my poles are cut to 6 feet. The length of your poles will depend on the length of your skis. Make sure you have enough clearance to achieve a full length stride.
Step 2 – Cut Poles to Length
After marking your measurements, cut your pole material with a hacksaw.
There are many options for pulk sled pole material. For an affordable solution I purchased two 10 ft pvc conduit tube sections from a hardware store.
Conduit poles are readily available and relatively affordable. However, over time I imagine that extremely low temperatures may make the material brittle. Since I am using this pulk sled for more casual weekend trips, I was willing to test the limitations of the conduit material.
Step 3 – Drill Poles and Sled
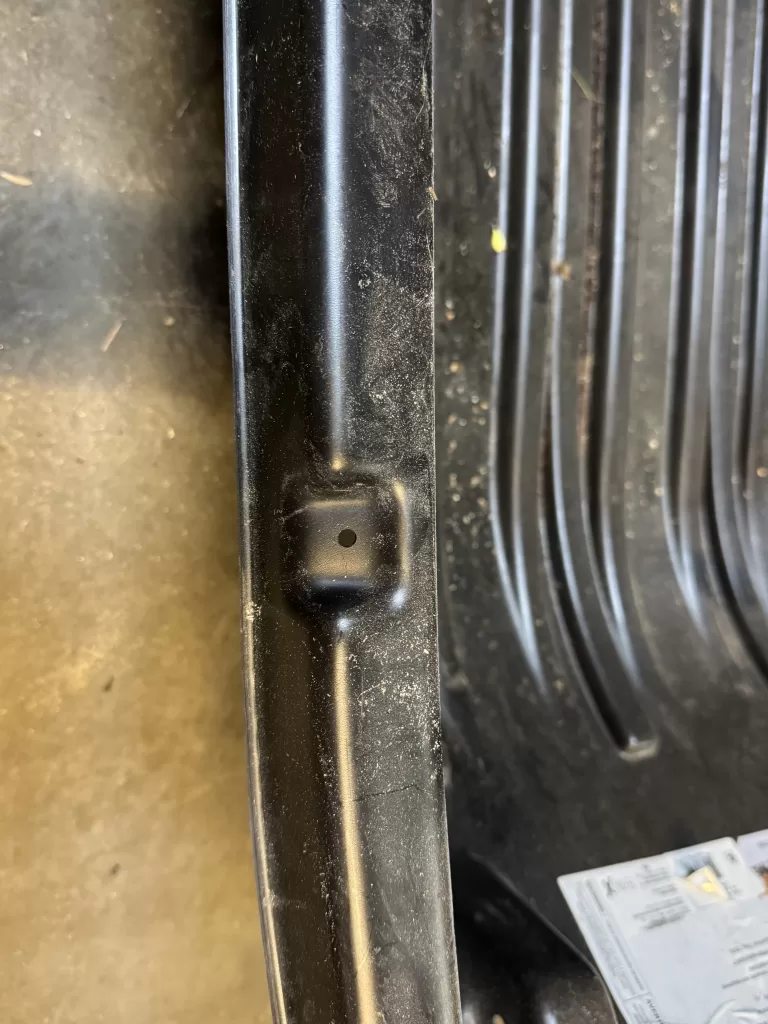
Drill 2 holes in the front of lip of the pulk sled. This is where you attach the pole line. Hole must be wide enough to feed your large rope through. In my case the holes were .75″.
Drill a hole about 1″ from the harness side of the conduit poles. Drill one hole in each pole. Again, large enough for your large rope – .75″.
Step 4 – Connect Pulk Sled and Poles using Rope
Pass your rope through the connecting holes on the front of the pulk sled.
Feed each running end of the rope through each conduit pole. Running the rope to the harness side hole you drilled. You may need to use a screwdriver or pair of pliers to pull the rope through the harness side hole.
At this point you should have your rope running through the length of both poles and through your pulk sled. The rope is the connecting point for your sled and your poles.
Many other pulk sled builds incorporate additional hardware at this connection point to improve durability. However, for a simple and affordable sled build, you can simply rely on a quality rope.
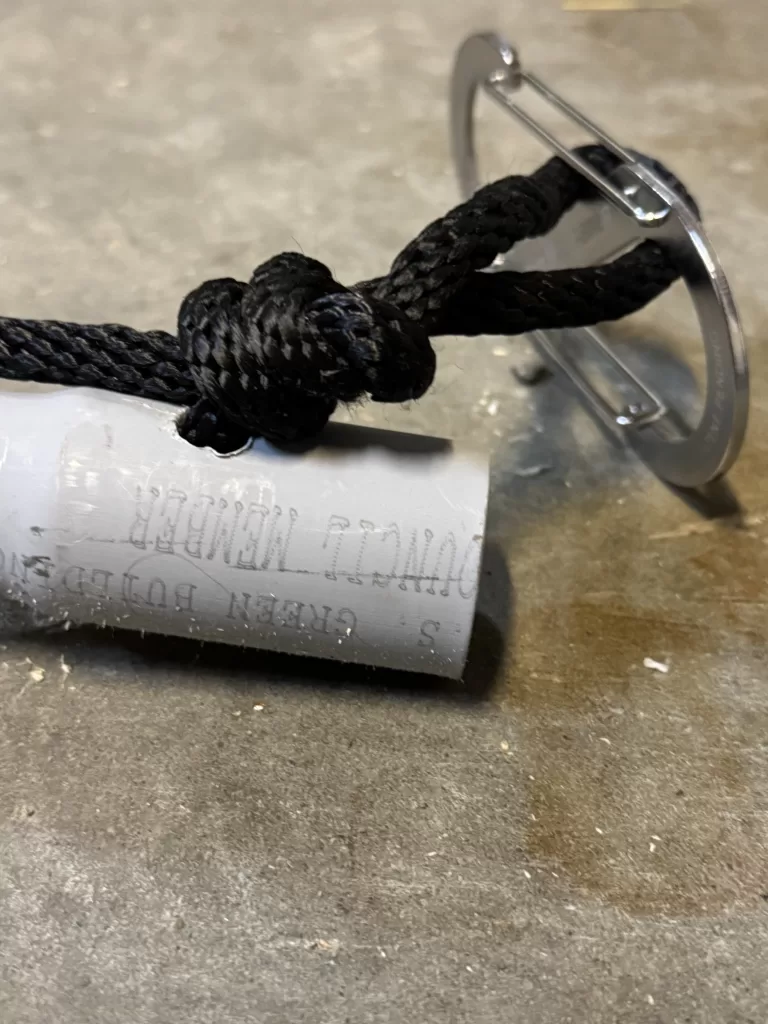
Both running ends of rope should be hanging out of the harness side holes. Pull as much slack as possible out of your lines. This should tighten the poles to the sled. Tie off the line slack using an overhand figure-eight knot, bowline knot or similar to create a stop. This will keep the poles rigid and provide a connecting point to attach your S-carabeaners.
Step 5 – Fasten S-Carabeaner and Pulk Sled Harness
Connect your S-Carabeaners to your loop knot at the harness end of your poles. You will use these S-Carabeaners to connect to your harness of choice. I simply connect these to a molle webbing strap on my backpack waistbelt.
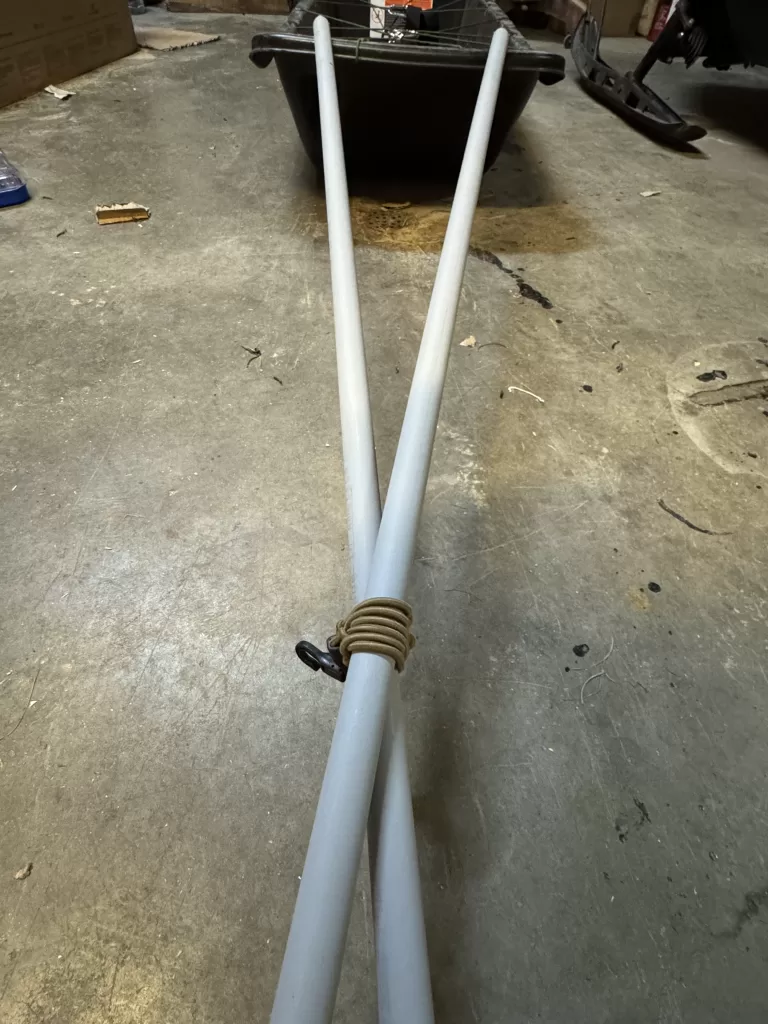
Before connecting to your harness, cross your poles over one another. Secure your poles using a velcro strap or a wrapped bungie cord at approximately the half-length point.
The crossed-poles will assist with turning and maneuvering your sled.
Step 6 – Build Your Load Bearing Liner System
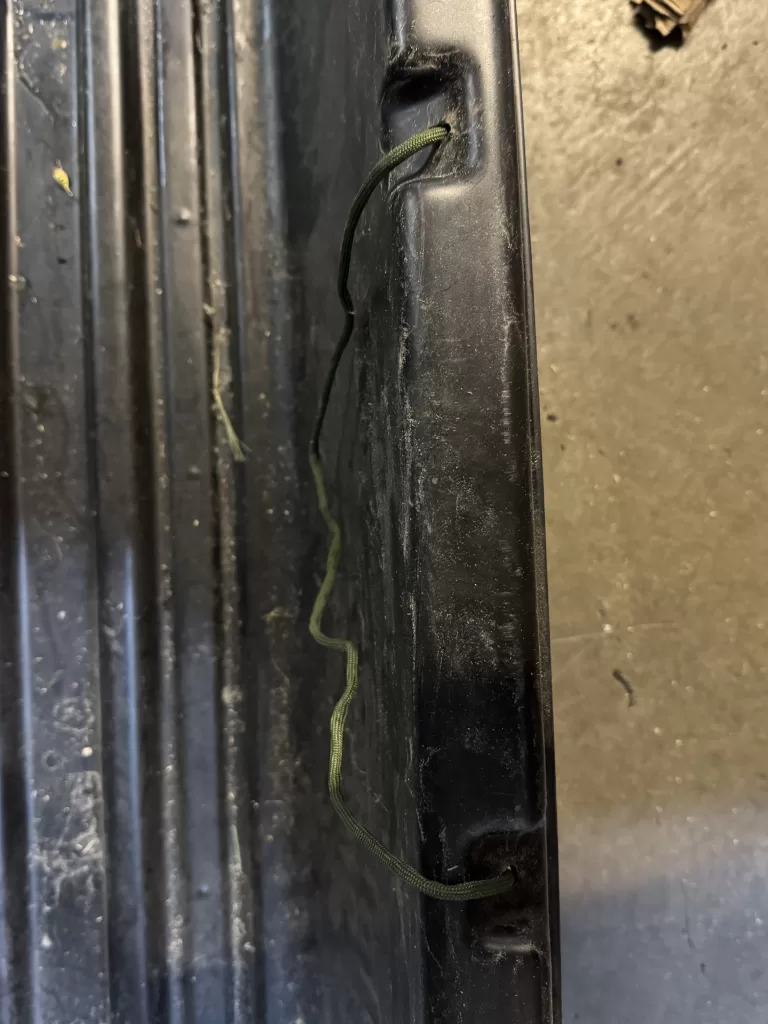
Drill holes evenly throughout the length of your sled. You will run your 550 paracord through these holes to create a clip liner for securing gear.
Once drilled, run your 550 paracord through the holes starting on one side of the pulk sled. Weave through each hole until you have paracord running lining the entire pulk sled.
Ensure each section between each hole has enough paracord length to be used to secure your load (see photo). Once you have pulled through enough slack, secure your line with stopper knots at your first and last hole.
Attach your standard carabeaners to each the paractor sections you just created. You can now use these paracord sections like straps to pull over equipment, attaching to the opposite section with a carabeaner.
A tarp or bivvy can be used to line the inside of the pulk sled to keep gear dry.
Step 6 – Test and Adjust Sled
This is an extremely simple sled build. There is room for improvement to ensure durability and better maneuverability.
Go test you sled and make adjustments where necessary.